Wednesday, October 19, 2011
Everything Bread
Everything Bread
This lovely braided loaf involves some time, but it's a tried-and-true favorite to serve with any meal, casual or formal. I promise it's worth the effort!
1 pkg. (1/4 oz.) active dry yeast
3/4 c warm water (110 - 115 degrees)
1 c warm 2% milk (110- 115 degrees)
1/4 c butter, softened
2 Tbsp. sugar
1 egg yolk
1 1/2 tsp. salt
4 to 41/2 c all-purpose flour
1 egg white
2 tsp. water
1 tsp. kosher salt OR coarse sea salt
1 tsp. dried minced onion
1 tsp. each sesame, caraway (I don't do the caraway---so any of these, actually, are optional) and poppy seeds
In a large bowl, dissolve yeast in warm water. Add the milk, butter, sugar, egg yolk, salt and 2 cups of the flour. Beat on medium speed for 3 minutes. Stir in enough remaining flour to form a firm dough.
Turn onto a floured surface, knead until smooth and elastic, about 6-8 minutes. Place in a greased bowl, turning once to grease the top. Cover and let rise until doubled, about 1 hr.
Punch dough down. (Get those frustrations out! lol..) Turn onto a lightly floured surface; divide dough into thirds. Shape each into a 20-inch rope. Place ropes on a large greased baking sheet and braid; pinch ends to seal and tuck under. Cover and let rise until doubled, about 45 minutes.
Combine egg white and water; brush over dough. Combine the salt, onion and seeds; sprinkle over bread. Bake at 375 degrees for 22-28 minutes or until golden brown. Remove from pan to a wire rack to cool.
Makes 1 loaf (25 slices)
Amish Friendship Bread Starter & Recipe
This is SO much fun to do! My youngest son, Tyler, absolutely loves this bread. It's been far too long since I've made it, mainly because I didn't have any friends/family living locally to pass the starter to. Now it's been on my mind lately and when some time frees up, I plan to start a batch & hopefully can keep it going.
This is going to be a long read, but I hope it brings back some sweet memories for you today as well!
Friendship Bread: Starter Recipe (Make ONCE)
1 C milk (room temperature)
1 C sugar
1 C regular flour (room temperature)
Note: Do NOT use self-rising flour!
Mix in a non-metallic bowl - glass or plastic is fine.
Note: The metal interferes with the chemical reaction that needs to take place.
Use a plastic or wooden spoon to stir. Don't be concerned if you can't get ALL the lumps out. Try to mix until lumps are pea sized, but with none larger than a grape.
Pour into a gallon sized freezer bag.
Note: the finished sponge will expand to over 2 to 3 times it's original volume. Let starter sit in a place away from drafts or hot breezes.
General Starter Tips:
Some people put a sponge in the refrigerator. Do NOT do this because the cold retards the action and the flavor is not as "full".
YOU SHOULD NOT REFRIGERATE A NEW STARTER
*Squeeze the bag to mix the starter daily*
The above is Day 1
Day 2
Squeeze the bag to mix
Day 3
Sqeeze the bag to mix
Day 4
Squeeze the bag to mix
Day 5
Add 1 C flour
1 C sugar
1 C milk
Squeeze the bag to mix
Note: The sponge will get foamy and frothy. Don't be alarmed. This is natural. The mixture is reacting together and expanding.
Try to resist the temptation to "tinker" with it!
Day 6
Squeeze bag to mix
Day 7
Sqeeze bag to mix
Day 8
Sqeeze bag to mix
Day 9
Squeeze bag to mix
Day 10
Add 1 C flour
1 C sugar
1 C milk
Squeeze the bag to mix
Bread Recipe (using completed starter)
To the balance, after separating ( a little over one cup) of the batter, add the following ingredients and mix well.
1 C oil
1/2 C milk
3 eggs
1 tsp. vanilla
In a separate (large) bowl, combine the following dry ingredients and mix well:
2 C flour
1 C sugar
1 1/2 tsp. baking powder
2 tsp. cinnamon
1/2 tsp. baking soda
1 (5.1 oz.) box instant vanilla pudding mix
1/2 tsp. salt
1 C nuts
Add dry ingredients to wet ingredients.
Mix and pour into two well greased and floured bread pans (I don't flour, I dust w/sugar. Mmmm)
Bake at 325 degrees for 1 hr.
**Here's a link to a post on my blog where I list several variations to this original bread recipe. Hope you'll try them out and then share your feedback with the rest of us!
Lasagne from South of the Border ~ Mexican Lasagne
It may sound odd, but I'm telling you this is SO good. I love dishes like this, that yield a very large quantity, giving you the option of serving for a gathering or putting away leftovers for another day.
Mexican Lasagne
1 lb. cooked Ground Beef OR Turkey (I've used turkey MANY times through our "vegetarian" yrs., still GOOD)
1 (16 oz.) can refried beans (again, can be vegetarian beans)
2 tsp. dried oregano
1 tsp. ground cumin
3/4 tsp. garlic powder
1 tsp. salt
12 uncooked Lasagne noodles
2 1/2 C water
2 1/2 C salsa
1 C sour cream
1/2 bunch finely chopped green onions
1 C shredded Monterey Jack cheese (OR, try Pepper Jack for some extra kick!)
Combine first 6 ingredients. Place 4 uncooked lasagne noodles in bottom of 13 x 9 x 2-inch baking dish. Spread half of the meat mixture over noodles. TGop with 4 more noodles and remaining meat mixture. Cover with remaining noodles. Combine water and salsa; pour over all.
Cover tightly with foil; bake at 350 degrees for 1 1/2 hrs., or until noodles are tender. Cover with sour cream, green onions and cheese. Even extra cheese woulnd't be out of the question. Bake uncovered until cheese is melted (about 5 minutes).
Serves 12
Mexican Lasagne
1 lb. cooked Ground Beef OR Turkey (I've used turkey MANY times through our "vegetarian" yrs., still GOOD)
1 (16 oz.) can refried beans (again, can be vegetarian beans)
2 tsp. dried oregano
1 tsp. ground cumin
3/4 tsp. garlic powder
1 tsp. salt
12 uncooked Lasagne noodles
2 1/2 C water
2 1/2 C salsa
1 C sour cream
1/2 bunch finely chopped green onions
1 C shredded Monterey Jack cheese (OR, try Pepper Jack for some extra kick!)
Combine first 6 ingredients. Place 4 uncooked lasagne noodles in bottom of 13 x 9 x 2-inch baking dish. Spread half of the meat mixture over noodles. TGop with 4 more noodles and remaining meat mixture. Cover with remaining noodles. Combine water and salsa; pour over all.
Cover tightly with foil; bake at 350 degrees for 1 1/2 hrs., or until noodles are tender. Cover with sour cream, green onions and cheese. Even extra cheese woulnd't be out of the question. Bake uncovered until cheese is melted (about 5 minutes).
Serves 12
Tuesday, October 18, 2011
Baked deep dish Spaghetti
I'd never had baked spaghetti until last weekend, when we attended a friend's event & someone brought it as a potluck contribution. I had seconds THAT day, and set out to find a recipe so I could make it at home. Found one online @ Cooks.com, but there were some issues. To begin with, the first ingredient was not to be found in the grocery store. So....after careful deliberation, I substituted something else. Secondly, there weren't ANY spices in the original recipe. Hello....Italian means spice, in my world.
Below is my version. I must say, this would definitely appeal to most kids! It's topped w/Pepperoni, and what kid doesn't like Pepperoni!? Doug doesn't...but that's another story. I ate his. And mine. This is also ridiculously simple to make. I hope you'll try it and let me know if you have a different version of this dish. Who knows, maybe I'll incorporate some of your tips into this recipe, making it that much better!
Baked Deep-Dish Spaghetti
1 pkg. Banquet Homestyle Bakes (Pasta & Meatballs in Marinara Sauce version) ***Side note: I NEVER buy these boxed dinners. While still not a fan, there IS a time & place for "semi-homemade". Oh, I also tossed their pasta aside, and used spaghetti versus macaroni or whatever it was
2 cans (15 oz. each) Marinara or Spaghetti sauce w/meat (the above kit includes these 2 cans)
1 can drained mushrooms
1 lb. ground beef
1/2 C chopped onion
1 C chopped bell pepper
**Here's what I added, & I didn't measure...but I'd say around 2 tsp. each: Basil & Oregano, 1 tsp. salt and 1 tsp. onion powder.
2 C shredded Mozzarella cheese
2 C shredded Monterey Jack cheese
1 pkg. Pepperoni slices
Cook Spaghetti and drain. Cook hamburger, onion and pepper together and drain. Add canned Marinara sauce and canned mushrooms from the boxed dinner.
Simmer 5 minutes. Mix spaghetti and meat sauce. Layer 1/2 of the spaghetti mixture, 1/2 of the cheese (include the cheese from the boxed dinner). Add remaining layer of spaghetti and cheeses. Top with pepperoni.
Bake at 350 degrees until cheese melts and pepperoni is lightly browned, about 30-45 minutes.
Makes 6-8 servings
Below is my version. I must say, this would definitely appeal to most kids! It's topped w/Pepperoni, and what kid doesn't like Pepperoni!? Doug doesn't...but that's another story. I ate his. And mine. This is also ridiculously simple to make. I hope you'll try it and let me know if you have a different version of this dish. Who knows, maybe I'll incorporate some of your tips into this recipe, making it that much better!
Baked Deep-Dish Spaghetti
1 pkg. Banquet Homestyle Bakes (Pasta & Meatballs in Marinara Sauce version) ***Side note: I NEVER buy these boxed dinners. While still not a fan, there IS a time & place for "semi-homemade". Oh, I also tossed their pasta aside, and used spaghetti versus macaroni or whatever it was
2 cans (15 oz. each) Marinara or Spaghetti sauce w/meat (the above kit includes these 2 cans)
1 can drained mushrooms
1 lb. ground beef
1/2 C chopped onion
1 C chopped bell pepper
**Here's what I added, & I didn't measure...but I'd say around 2 tsp. each: Basil & Oregano, 1 tsp. salt and 1 tsp. onion powder.
2 C shredded Mozzarella cheese
2 C shredded Monterey Jack cheese
1 pkg. Pepperoni slices
Cook Spaghetti and drain. Cook hamburger, onion and pepper together and drain. Add canned Marinara sauce and canned mushrooms from the boxed dinner.
Simmer 5 minutes. Mix spaghetti and meat sauce. Layer 1/2 of the spaghetti mixture, 1/2 of the cheese (include the cheese from the boxed dinner). Add remaining layer of spaghetti and cheeses. Top with pepperoni.
Bake at 350 degrees until cheese melts and pepperoni is lightly browned, about 30-45 minutes.
Makes 6-8 servings
Like my new bag? Passing along a great find
Great gift idea ~ Orange Cappaccino Caramels
I've made these several times and I'll admit wrapping each one afterwards can be time consuming, but they are SO worth it. I do want to point out--these are NOT hard caramels, but softer. They're unique and make excellent Christmas gifts, but I also think caramel is appropriate for all of Fall.
Orange Cappaccino Caramels
1 C butter
1 (16 oz.) pkg. (2 1/4 C) packed brown sugar
1 (14 oz.) can (1 1/4 C) sweetened condensed sugar
1 C light corn syrup
3 T instant coffee crystals
1/2 to 1 tsp. finely shredded orange peel
1 C chopped walnuts
1 tsp. vanilla
In a heavy 3-qt. saucepan, melt butter over low heat. Stir in brown sugar, sweetened condensed milk, corn syrup, coffee crystals and orange peel. Carefully clip candy thermometer to the side of the saucepan.
Cook over medium heat, stirring frequently, till thermometer registers 248 degrees, which is firm-ball stage. Mixture should boil at a moderate, steady rate over the entire surgace. Reaching firm-ball stage should take 15-20 minutes.
Remove saucepan from heat; remove candy thermometer from saucepan. Immediately stir in walnuts and vanilla. Quickly pour the caramel mixture into a foil-lined and butterred 8 x 8 x 2-inch baking pan.
When caramel is firm, use foil to lift it out of pan. Use a buttered knife to cut candy into 3/4 to 1-inch squares. Here's the fun part.....Wrap each piece in clear plastic wrap. Or just pop 'em in your mouth, thus eliminating the packaging part. LOL!
Makes about 100 pieces or approximately 3 pounds.
Monday, October 17, 2011
Decorate YOUR cooking appliances!
I'm super busy in the kitchen again today, preparing to ship some of my products out & also getting tasting samples and product ready to take to a local business. But......I was just sidetracked by a friend on FaceBook who posted a link I want to share with you all.
We were talking KitchenAid mixers, and how much we love 'em.....I'm sure putting mine to good use lately. I may burn out the motor at some point here, but we'll cross that bridge when it comes. That would actually be a VERY good "problem" to have.
Anyway, you MUST check out these decals and the pictures on the site that show how creative you can be with them. http://tradingphrases.com/_search.php?page=1&q=kitchen+aid&x=0&y=0
While you're looking, be sure to check out all the other things they sell. Great selection, great prices and great service!
We were talking KitchenAid mixers, and how much we love 'em.....I'm sure putting mine to good use lately. I may burn out the motor at some point here, but we'll cross that bridge when it comes. That would actually be a VERY good "problem" to have.
Anyway, you MUST check out these decals and the pictures on the site that show how creative you can be with them. http://tradingphrases.com/_search.php?page=1&q=kitchen+aid&x=0&y=0
While you're looking, be sure to check out all the other things they sell. Great selection, great prices and great service!
Friday, October 14, 2011
Making every day grand
I've only got one grandchild of my own, but when I married my husband 4 months ago, I gained a bonus of 5 more grandkids. Doug's whole family has embraced me so warmly, but the grandchildren really bring a special kind of joy to my life. I've yearned for this.
If you'd been reading this blog and/or my Facebook page(s), then you know that I've been very busy baking in preparation for an event this weekend. I've spent entire days in the kitchen, cranking out goodies and am completely exhausted, but also excited to see the feedback for my products.
This week Grand Parent's Day celebrations for Korey, who's in Kindergarten, and for Julia, who is in 4th grade took place on two separate days. We're still waiting to hear if and when the schools that Lindsey, Ben & Nick will hold their Grandparent Day events ~ we'll be there! Moments in life such as these are the ones we never regret showing up for. I'm so glad I pushed work things around to make the time...it was definitely worth every single minute.
It was heartwarming to read her recollection of her first overnight stay in our new home. I'm looking forward to so many more special times together!
If you'd been reading this blog and/or my Facebook page(s), then you know that I've been very busy baking in preparation for an event this weekend. I've spent entire days in the kitchen, cranking out goodies and am completely exhausted, but also excited to see the feedback for my products.
This week Grand Parent's Day celebrations for Korey, who's in Kindergarten, and for Julia, who is in 4th grade took place on two separate days. We're still waiting to hear if and when the schools that Lindsey, Ben & Nick will hold their Grandparent Day events ~ we'll be there! Moments in life such as these are the ones we never regret showing up for. I'm so glad I pushed work things around to make the time...it was definitely worth every single minute.
| This is Korey's artwork |
| We learned that Korey's "job" is classroom "Messenger" |
| Showing off the book Papa bought her from the book fair |
| Decorating picture frames for Grandparents Day |
Finished masterpiece! |
The following day we went to Julia's classroom, which was overflowing with grandparents! The support in that room was truly lovely to witness. Not everyone is so fortunate to have their grandparents in close enough proximity to allow for visitations such as this, and even that does not guarantee that one is fully present and engaged.
The children "interviewed" us, which was hilarious. They asked a short series of questions, such as what year we were born. When I answered 1958, Julia wrote down 1858. I said, "I'm old, Julia, but not THAT old"!! We were given a booklet in which the children described a favorite memory between them and their grandparent(s).
| PapaDawg was caught snitching one too many treats, lol! |
Thursday, October 13, 2011
Scare up some Halloween party treats
LOVE this, and looks super-duper easy! Found in http://www/dashrecipes.com
Witch Hats
Orange food coloring
1 Container Cool Whip
Canned chocolate frosting
6) chocolate graham crackers
6) chocolate waffle ice cream cones
assorted M & M's candies, for garnish
Stir orange food coloring, a few drops at a time, into 1 container thawed Cool Whip until it's the desired shade of orange. Spread canned chocolate frosting on 6 chocolate graham crackers. Fill 6 chocolate ice cream cones with Cool Whip. Place the cones upside down on grahams to form witch hats. Decorate cones with colored M & M's, using frosting as "glue".
Tuesday, October 11, 2011
Hello from my kitchen!
Just wanted to share some pics with my readers. I'll be in the kitchen all this week, preparing for a bazaar on Oct. 15th & 16th. So far I've made enough cookie dough for 45 dozen cookies and today I'm finishing up fudge. By day's end, I should have 36 pounds of fudge. Later this week I'll be making 24 loaves of banana streusel bread.
| Peanut Butter Fudge w/Nuts |
| Assembly line fashion..... |
| Boxes for fudge |
| Packaged & ready to sell! |
Is your mouth watering yet?? I can tell you it sure smells good in this house! Remember, I have pricing and order information here on my blog. Just look for the tab at the top left of my Home page.
Sunday, October 9, 2011
Welcome to my world
This is the view from our bedroom window, although the picture doesn't do it justice.
Doug and I start each day with coffee in bed, and we've yet to run out of things to say. It's a lovely tradition. Today I just wanted to share this beautiful view with you.
Here's hoping you're enjoying Autumn wherever you are!
Saturday, October 8, 2011
Life is delicious!
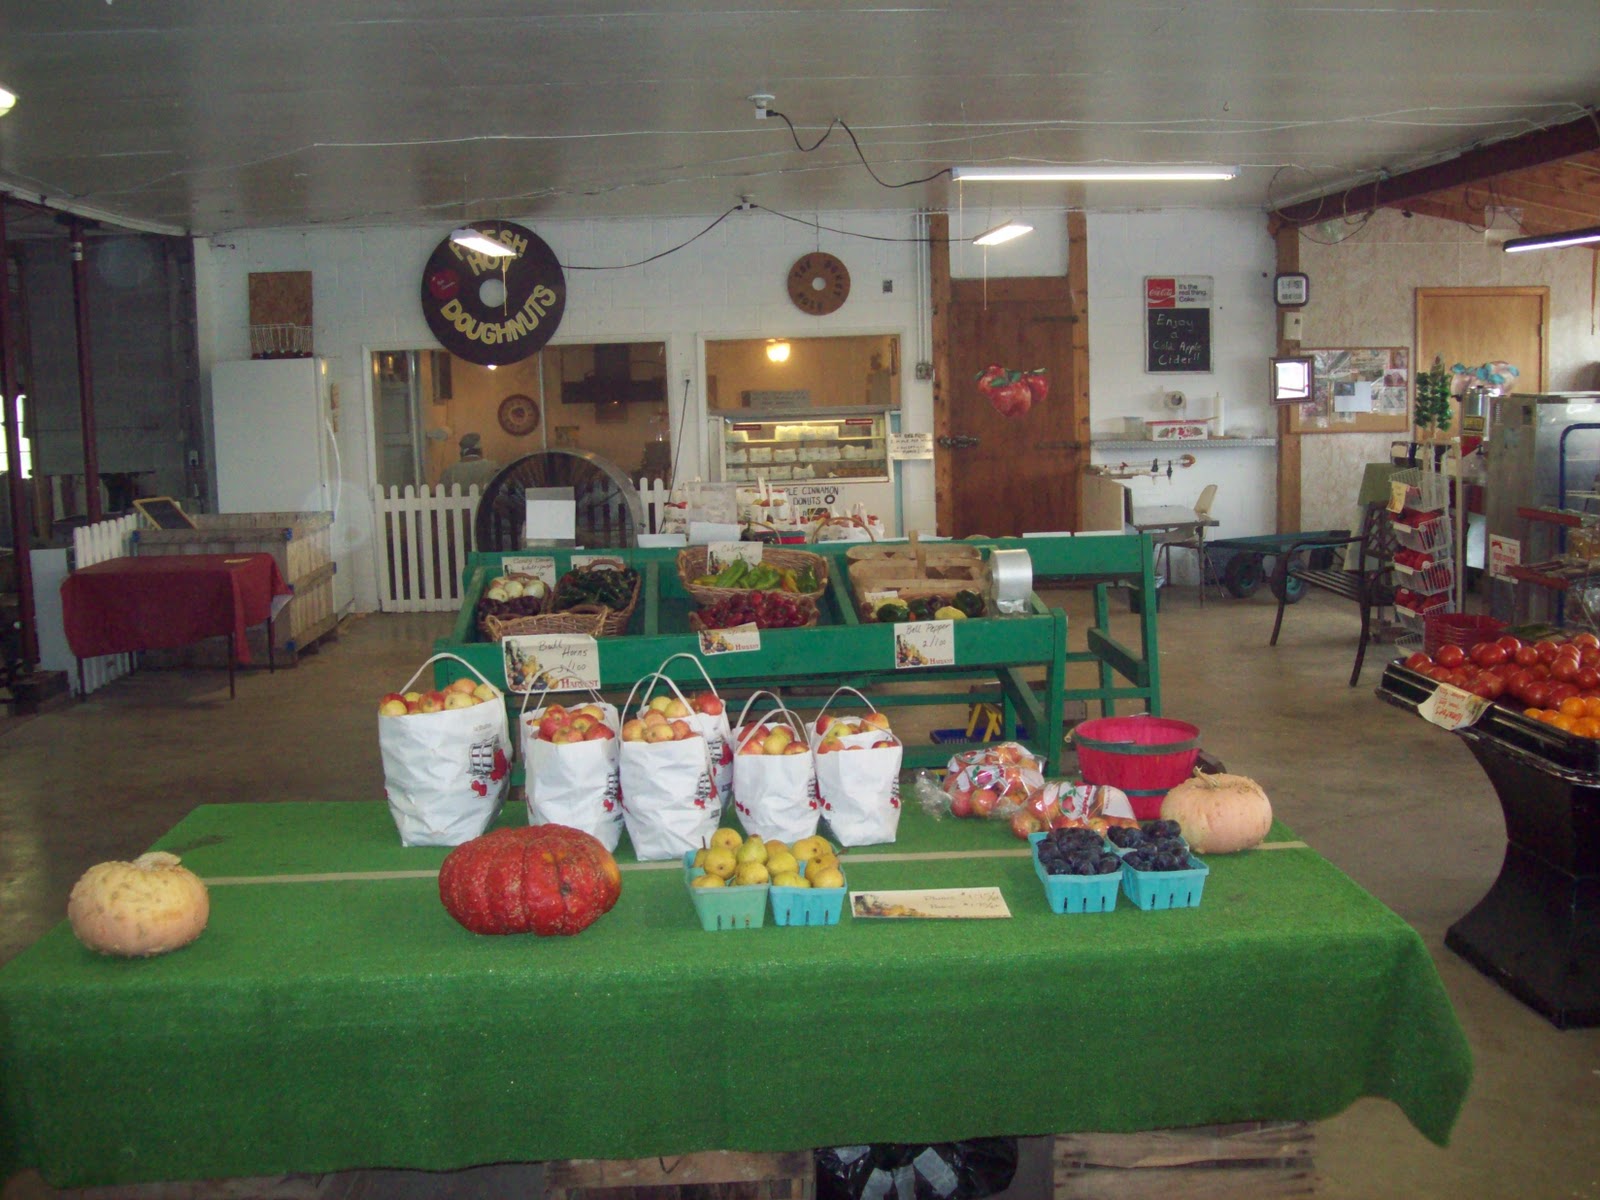
Fall has only begun yet we have visited http://www.jacobsfamilyorchard.com/ twice recently, with both sets of my husband's grandchildren.
In late September the weather was so nice when we took the girls, Lindsey, Julia & Korey. We went back in early October with Ben and Nick, but it was a breezy & chilly day--what a difference a week makes! Inside the store are sacks of apples, naturally, but they also sell fresh apple cider in jugs, caramel apples, apple cinnamon donuts and apple slushes which I tried for the first time---oh so good!
| Julia & Korey |
As you approach the front door of the store, the resident dog greets you. I'm sure he receives
lot of treats because he's so darned handsome and friendly.
Outside they have a corn maze and a small pen with goats that one can pet and/or feed apples. They also have a large stack of hay that all the kids loved climbing up and down....oh to have that kind of energy again!
| Korey's found a hiding spot! |
| Left to right: Jami (Doug's daughter), Lindsey, Julia & Korey |
| Nick |
| Ben |
| Follow Ben, the leader! |
| The girls made it! |
| Julia & Lindsey petting one of the goats |
After burning off some energy and calories, everyone picked out their own pumpkin from the patch. Naturally we HAD to bring back a couple dozen (warm, right from the oven!) donuts.
| Julia's got hers! |
| Miss Korey |
Subscribe to:
Posts (Atom)